So if you have kids like I do, storage is huge and in our house there is storage bins, baskets, and book cases in every room and they are full!
So I needed more storage for the office for little stuff and papers and really didn’t want to spend a lot of money. I’m obsessed with the wood crate boxes and racked my brain trying to figure out a way to turn them into more useful storage.
Sooooo here is my take on DIY storage using wood crate boxes.
Supplies
I went to Joann’s fabric and bought 4 unfinished wood crate boxes (to make 2 storage units) – http://www.joann.com/wood-crate/8160715.html#q=crate&start=1 *tip never buy with out a coupon!!!
Next stop was Home Depot (swear I live there!) and picked up the following:
- 8 top plates (remember I am making 2 units) – http://www.joann.com/wood-crate/8160715.html#q=crate&start=1
- 8 parsons style table legs – http://www.homedepot.com/p/Waddell-6-in-Parsons-Table-Leg-2656/100553906
- 1 pack of flat braces (contains 4) – http://www.homedepot.com/p/Superstrut-1-2-in-2-Hole-Flat-Straight-Bracket-ZAB206-10/100344490
Other supplies needed:
- Elmers wood glue
- Drill
- Paint
Ok that’s all you need to get started!
1 – Take the 2 crates and glue them together with Elmers wood glue, and let them dry.


2 – Once dry, screw the flat braces on the backside for added stability.

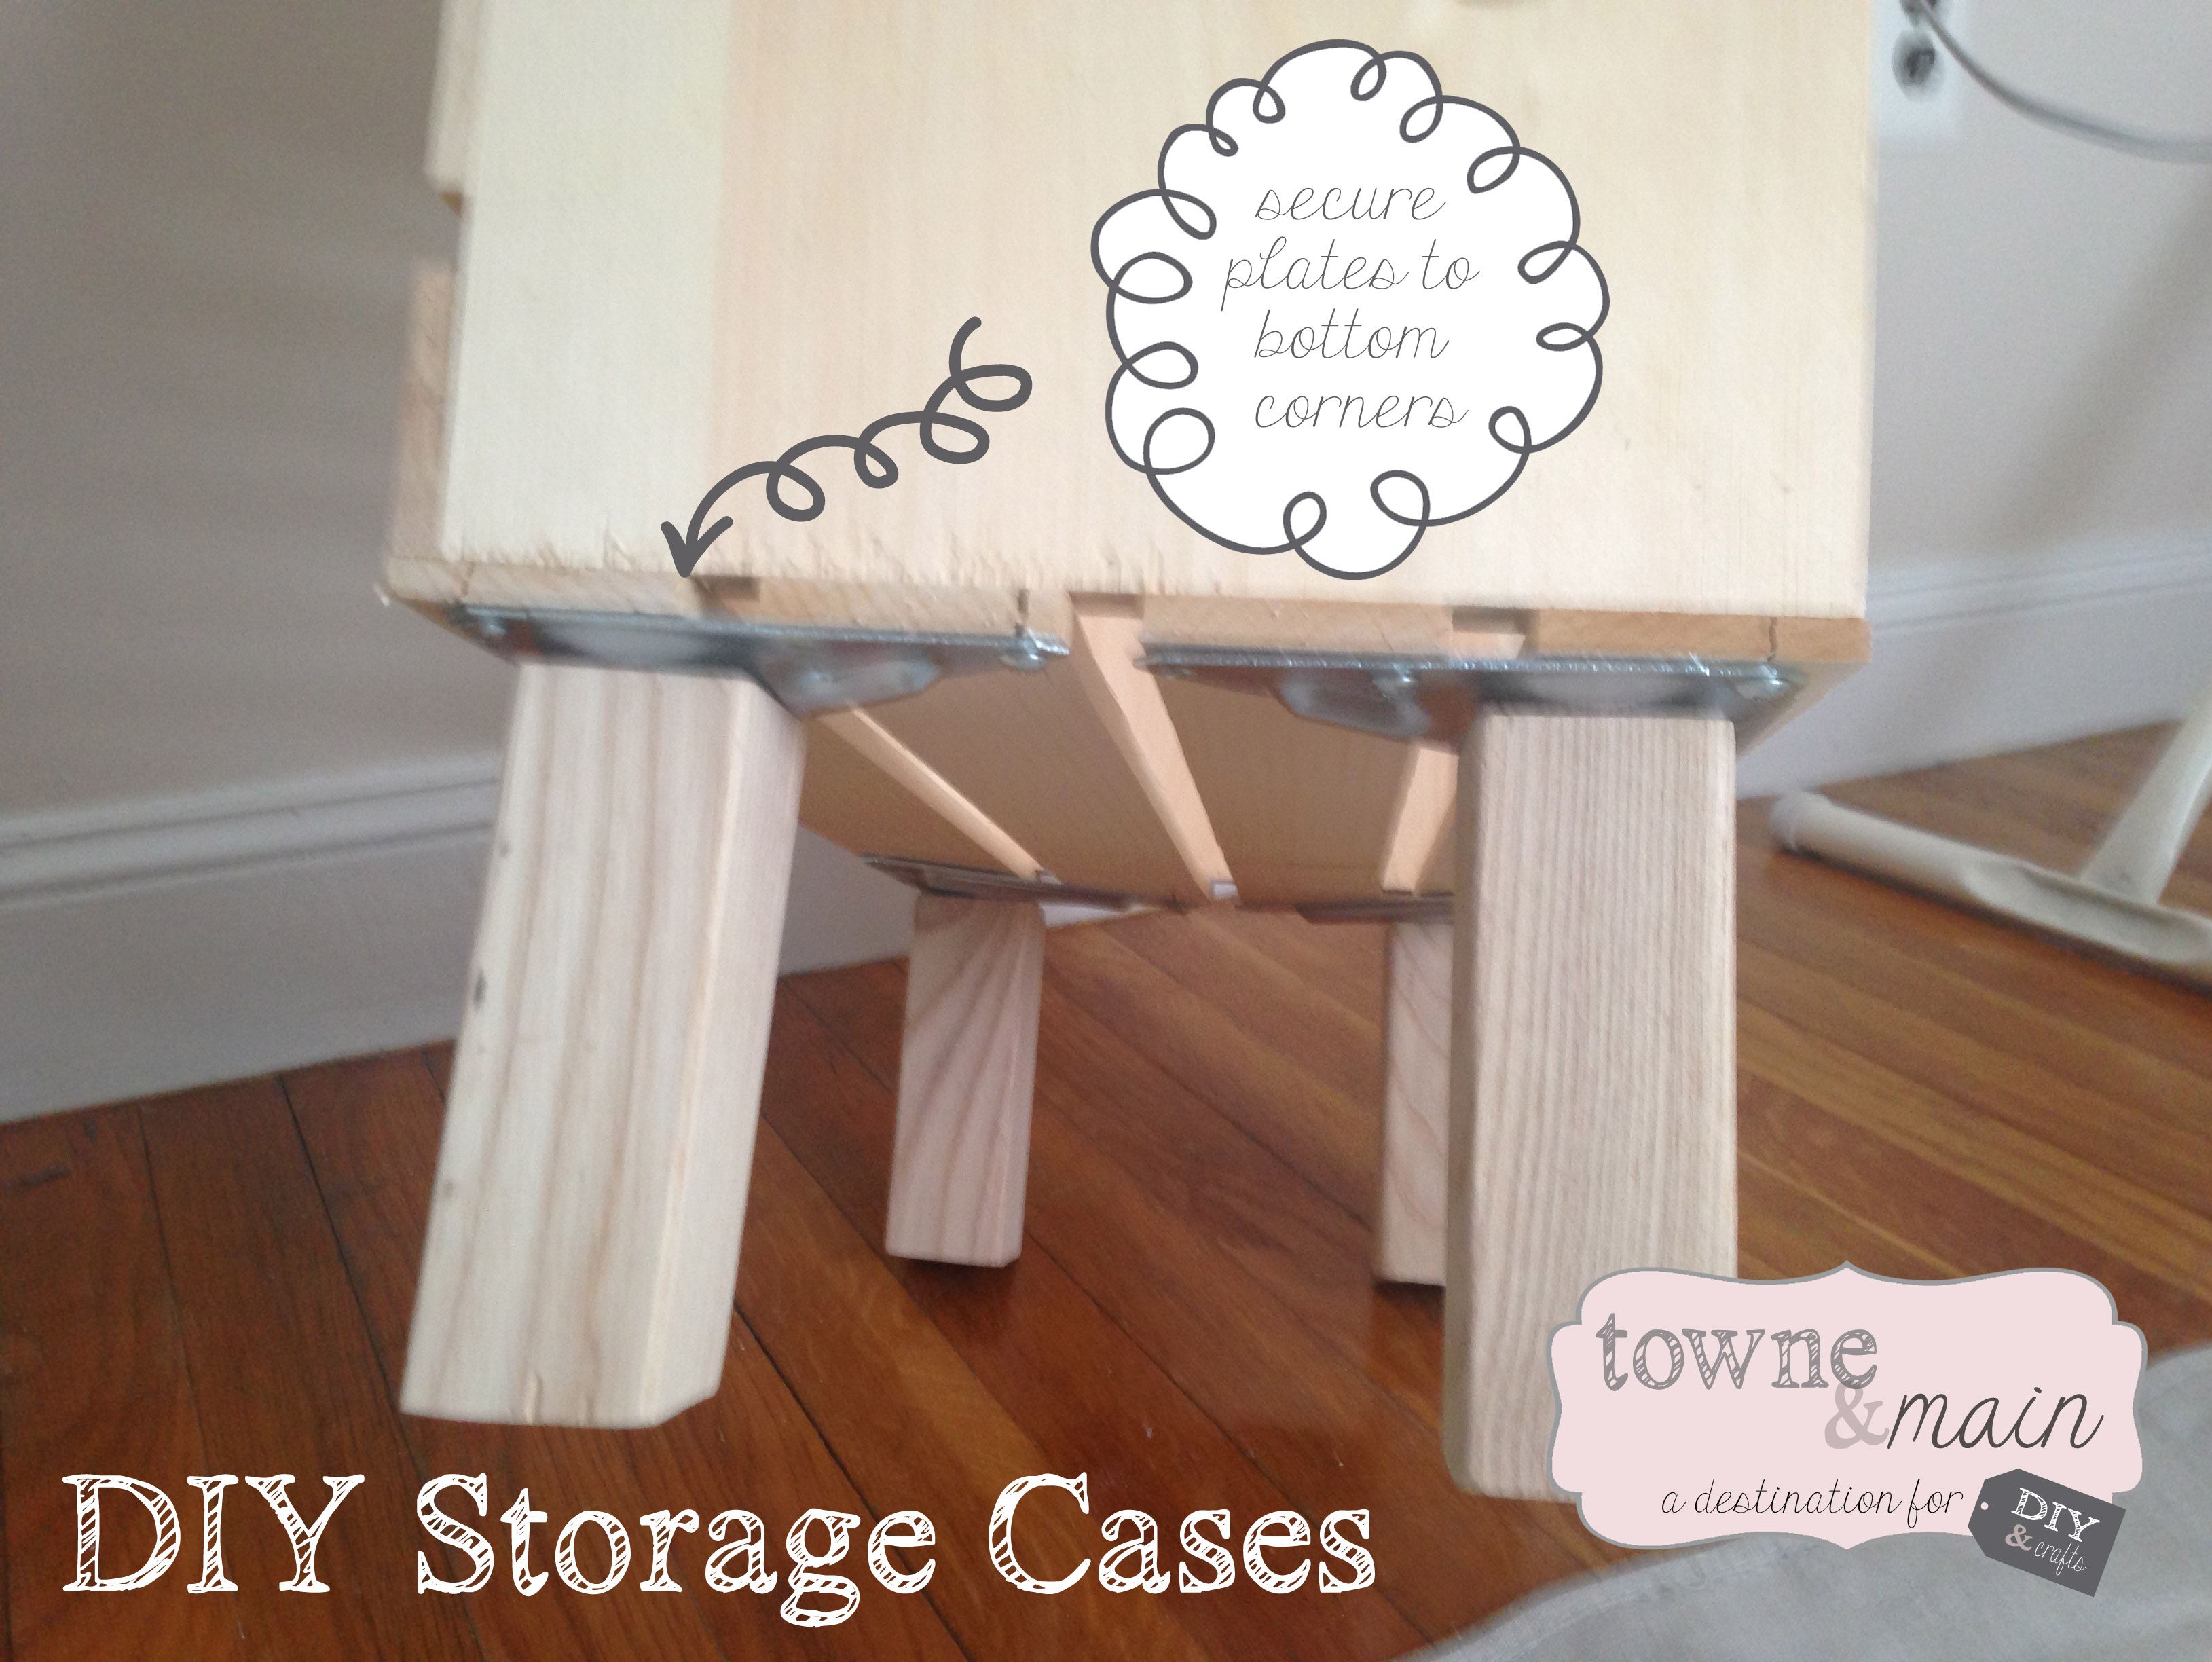
3 – Turn the unit upside down and screw in the top plates for the legs in each corner. *Tip the wood crates are made of thin wood, so I swapped out the screws the plates came with and used smaller ones I already had.
4 – Screw your legs in. *Tip you can sand down the legs or cut them to desired height if you want, that’s what I did, I actually took off 1.5″ in height for the space I was trying to fill.


5 – paint in desired color!


I think these came out great, they are so easy and cute for small storage needs. Add baskets for even more style.

I made nightstands myself similar to these and just an FYI to anyone else looking for these crates, Walmart sells them for 16-18 a piece but Home Depot carries thee same ones for 7.89 a piece!! Much cheaper and the same exact size and quality.
LikeLike
Thanks for that tip.
LikeLike
I am going to try this, but painted black!
LikeLike
Did you ever make it? do share!
LikeLike
I love this project, will do,Thank you
LikeLike
I did this love it. I used little wood flower pots for legs. Used alot
LikeLike
Awesome! fun project and gets tons of use!
LikeLike
I make my own crates. Sometimes my own furring strips. Can make them whatever size I need. About 2.00 to make and very simple
LikeLike
That’s awesome Ruth! Crates are one of my favorite storage items. put up some pictures to share I’d love to see!
LikeLike
I want to try this for my grandkids
LikeLike
Try it! it was fun and so practical we still use to this day!
LikeLike
I would like to try this out but I don’t own a drill. Do I need a drill or can I make the holes using some nails and hamering it in a little to make a hole. I have done this with walls before. Also I think it would look nice with chalk paint but what is the cheapest option?
LikeLike
Hi Joy! sorry for the delay…. when I first started crafting with wood I didn’t have a drill either and I did exactly what you did nail a little hole to get you going and use your screw there after…. chalk paint is my favorite but can be pricey! check out my diy chalk mix that I swear by here -https://towneandmain.com/diy-chalk-paint-2/ good luck and have fun! send pics when its done 🙂
LikeLike
I just bought 3 crates to do the same thing. I do think they need to be sanded before painting. Yes or no?
LikeLike
a light sand might be all you need! depends on the quality of the wood – send pics when your done have fun!
LikeLike
What kind of paint did you use?
LikeLike
I used regular latex matte finish paint
LikeLike